
You can also check out this blog over at 80 Level
Part one - water wrinkle effect basics
Part two - water wrinkle effect opacity
Part three - waterfall basics
Part four - waterfall color, opacity and vertex displacement
NOTE: This blog post contains loads of GIFs, I recommend you don't view this if you are on a mobile network!
Welcome back to part 2! In part 1 we discussed the basic ingredients to make our effect work, in this part we'll continue working on the stylized water wrinkles, next part we'll go into the actual waterfall itself.
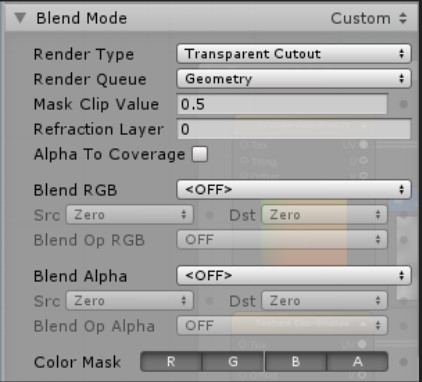
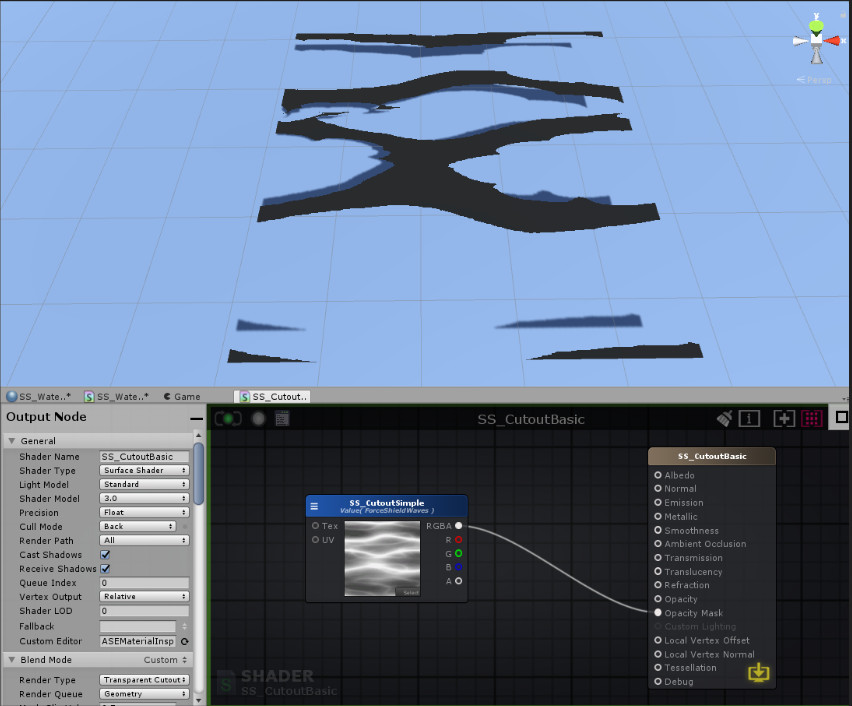
Next we need some transparency. Just a quick rundown of how stuff you should know when working in a shader. A lot of the simple calculations you'll do in a shader will be with values of 0 and 1, and everything inbetween. Generally speaking, 0 = black and 1 = white. This also means that 0.5 is a gray tone and, for example, 0.2 is a dark gray tone. When you hook these values to, in this case, the Opacity channel of your main output node, you'll control how transparent the material is rendered. Keep in mind that you will have to enable this to give the shader the ability to do this. In amplify, you can change the render type (under blend mode) from Opaque (no opacity at all) to, for example, transparant. In this case we'll use the 'transparent cutout' render type. This means a pixel displayed by this material is either completely transparent, or completely opaque. You can also see this in the GIF above, there are no 'half transparent' pixels displayed by this shader.
To demonstrate what happens, I took a step gradient texture and put it in the shader. Here it is hooked up to the albedo (color) output of the main node.

And here it is hooked up to the Opacity Mask output (this one is enabled when you choose the transparent cutout render type).
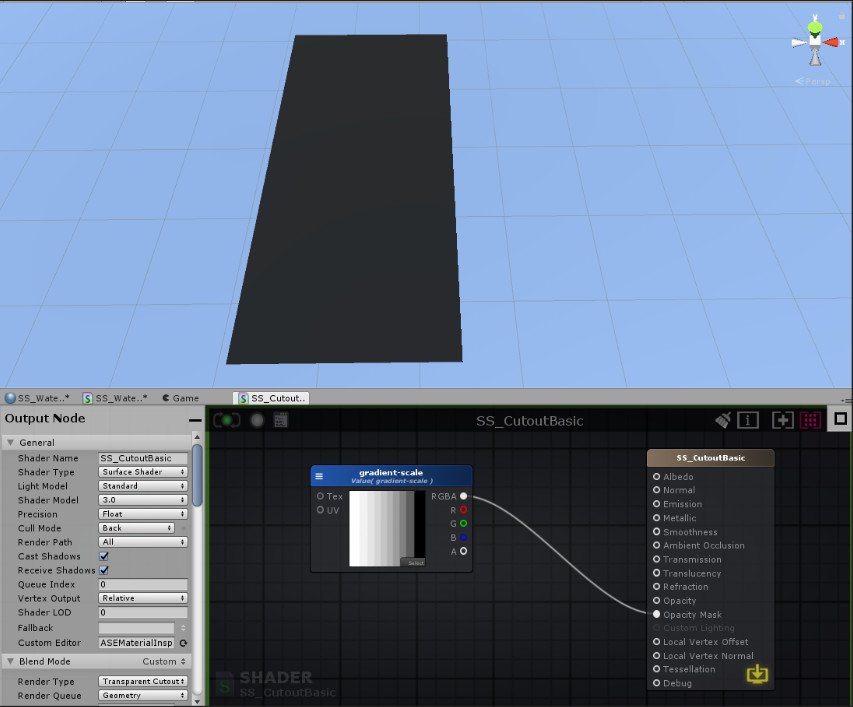
As you can see, it used the black/white values of the pixels of the gradient texture to decide to either render it opaque or fully transparent. Everything between 1 (white) and 0.5 (gray) is rendered opaque, and everything between 0.5 (gray) and 1 (black) is rendered fully transparent (or not rendered at all, I guess). The opacity mask creates a hard cutoff and just rounds the values off to either 1 of 0, whichever is the clostest value.
Another grayscale texture...
Hooked up to the opacity mask...
You get the idea. You probably also understand how we can use this to get our desired effect...
Just to clear up some possible confusion, you see a mostly blue image scrolling in the shader graph above. You also see I'm only using the R (red) output of that node. For optimization reasons, I have packed 2 grayscale textures in a single file. You don't really have to do this, I just try to constantly keep optimization in mind. It's also a lot more neat. You can pack images like this using Photoshop or Substance Designer.

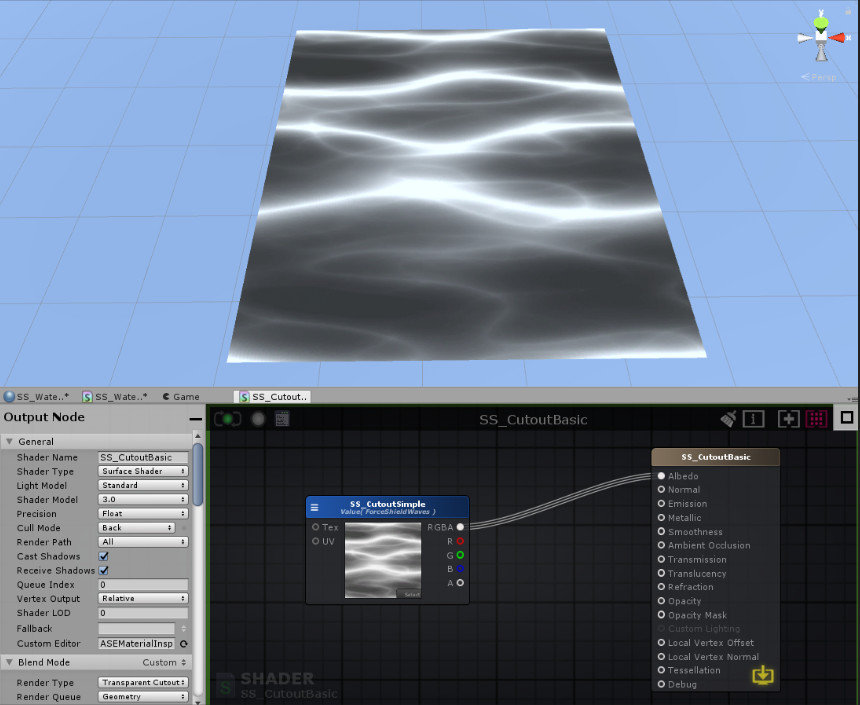
As you can see, I'm still just working with grayscale images. The ripple effect we got now is a good start, but we can do better! Why not layer 2 grayscale textures on top of eachother to get a more random feeling effect?
As you can see we are using the same texture, but adding the different channels on top of eachother. We are also panning them at different speeds, and in a slightly different direction. I made the texture in such a way that it has a nice gradient of gray values. This gives us this randomly feeling watery effect. Note that the GIF below has one extra thing added in the graph we did not yet discuss so don't be scared if yours doesn't look as watery.
You see, as, for example, a pixel with a value of 0.2 (which is not rendered) passes on top of a pixel with a value of 0.4 (which is also not rendered, only those above 0.5 are) it suddenly is a pixel with a value of 0.6, because we are using an add node (the 0.2 is added on top of the 0.4 making 0.6). Adding these 2 wavey grayscale textures on top of eachother with different speeds gives us close to the desired effect.
To demonstrate what happens, I added the grayscale textures on top of eachother in Photoshop so you can see what happens.
However, the seam at the end of the mesh is still way to obvious. What we really want to have is this:

Instead of this:
Note how the ripples kind of slowly die and become smaller when they near the end of the mesh in the first one, compared to the hard cutoff in the second one. As far as I know, the simplest and cheapest way to do is is to utilize vertex colors.
Vertex colors are, again, 0 to 1 values. Every vertex in your 3D model has some data with it. The X, Y and Z position obviously is one of them, the normal direction another one. You can also give every vertex a vertex color using your 3D software. Just like textures, you can use the R, G and B channels seperately or together. Here you can see the vertex colors I'm using. The most outern vertices have a value of 0 (black), getting more white (closer to 1) when getting closer to the centre (note you'll really need some subdivisions to get the vertices to apply the color to).
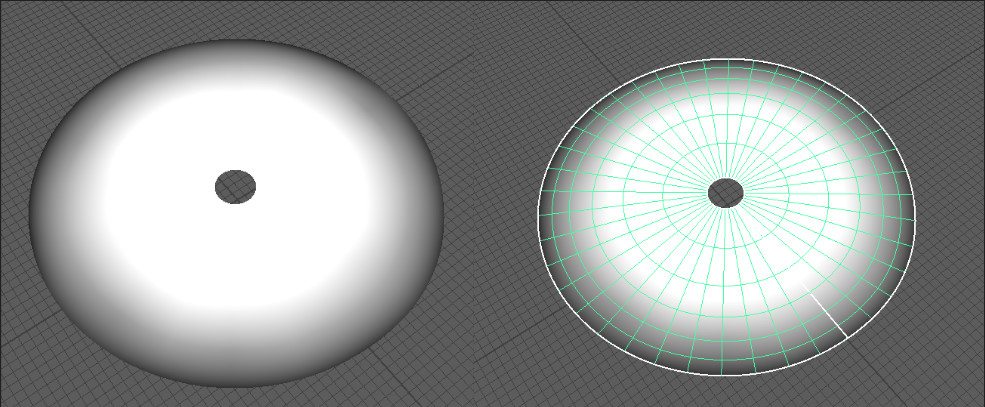
In Maya you can go to mesh display > paint vertex colors (hit the more options box) to paint these values. If you're using Blender or Max and don't know how to do this, just google it.
Now we can just hook up the vertex color in our shader with a simple multiply...
To demonstrate what happens a bit better, I also made a GIF in Photoshop. I put a gradient on top of the textures we are using and set the layer mode to multiply.
As you can see, the gradient forces the gray values more and more to 0 (black) so pixels will have to 'fight' harder to be rendered (remember, they are not rendered below a value of 0.5). This results in the 'wrinkles' getting smaller and smaller the closer they are to the edge (the vertex colors basicly act as the gradient).

Here's the full graph, I added some extra nodes that allows you to control the thickness of the wrinkles.
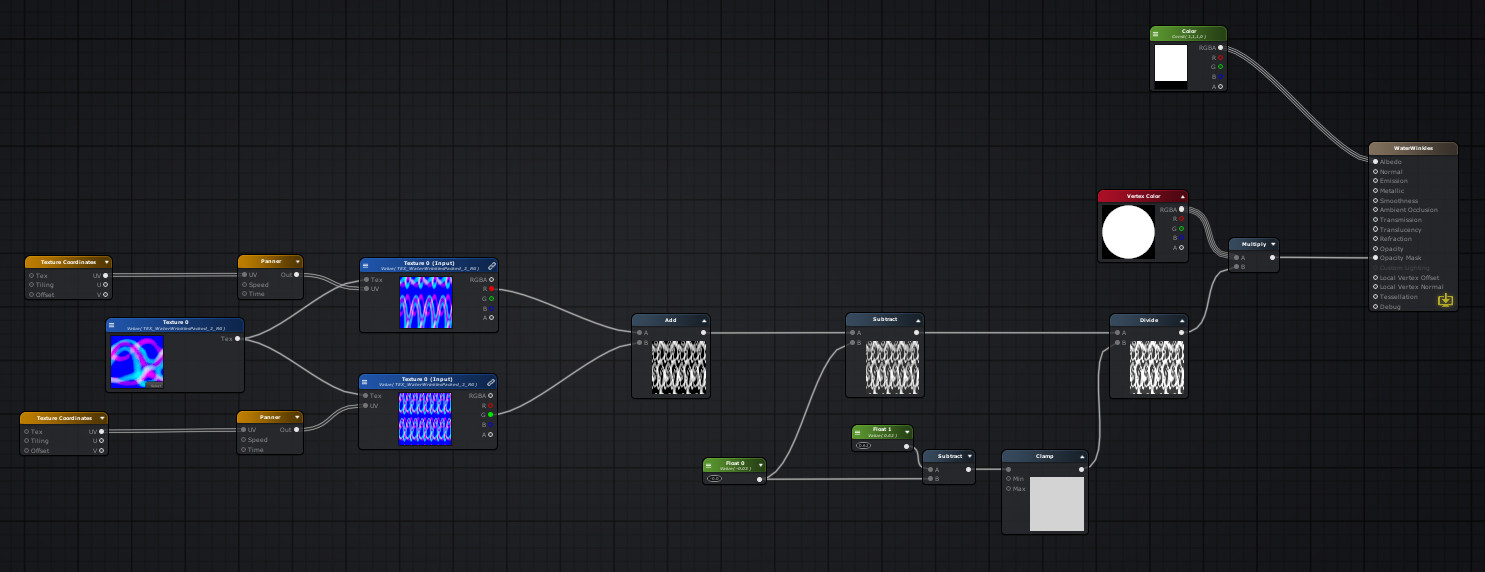 Just play around with the panning speed/direction, tweak the textures and try to change up the tiling (but make sure it will still tile in the UV's!) to really get the most out of this effect. I hope you learned something, next up we will go into the actual waterfall itself. I hope to post this quite soon. If you got any questions or corrections, please let me know! Thanks for reading.
 Part one - water wrinkle effect basics
Part two - water wrinkle effect opacity
Part three - waterfall basics
Part four - waterfall color, opacity and vertex displacement